In the previous post we introduced the HM-10 module and showed how to use it as a peripheral device. In this post we will configure the module to work as a central device and as an iBeacon. We will also show how to upgrade the firmware of the module to a new version.
Enjoy!
Configuration of HM-10 as a Central Device
The factory firmware of the HM-10 module can be configured as a central device that can connect to another (peripheral) HM-10 and exchange data over BLE. You have to send the following commands to set ip up:
AT+ROLE1
AT+IMME1
AT+RESET
Once the module is reset, it can discover peripheral devices and connect to them:
AT+DISC? (list of MAC addresses of discovered peripheral devices) AT+CONnnnnnnnnnnnn (connects to the device with hexadecimal MAC address)
Once connected, both modules can start the exchange of data through their respective serial connections. In principle this mechanism is designed to connect to another HM-10 module, but it can also be used to connect to any other peripheral device that emulates an HM-10. This set-up can also be used to send AT commands from the central device to the peripheral device (using AT+MODE2).
Configuration of HM-10 as an iBeacon
This section is based on the detailed tuturial written by blueminance.
To configure the HM-10 module as an iBeacon (it broadcasts advertising messages but does not allow any connection) you need to send this sequence of AT commands:
AT+RENEW  //Reset the module to the original factory settings
AT+RESET  //Restart the module
AT  //Resend this command until the module is ready and answers OK
AT+MARJ0xnnnn  //Define the Major value of the iBeacon (hexadecimal)
AT+MINO0xnnnn  //Define the Minor value of the iBeacon (hexadecimal)
AT+ADVI5  //Define the advertising interval (Value 5 corresponds to 546.25 milliseconds)
AT+NAMEMyiBeacon  //Define the device/iBeacon name (choose a unique value)
AT+ADTY3  //Configure the device as non-connectable
AT+IBEA1  //Enable iBeacon mode
AT+DELO2  //Configure iBeacon as broadcast only
AT+PWRM0  //Enable auto-sleep to reduce energy consumption
AT+RESET  //Restart the module
Once setup, the module will stop flashing its LED (energy saving) and will keep asleep most of the time, so it will not react to AT commands. In order to wake up the module and send new AT commands there are two options:
BRK pin in the breakout board) to ground (GND) for one second
Firmware Upgrade
Warning: if the installation of a new firmware fails, the module can be bricked and become useless. If you follow these guidelines, you assume this risk under your responsibility
Note: This procedure requires Windows OS
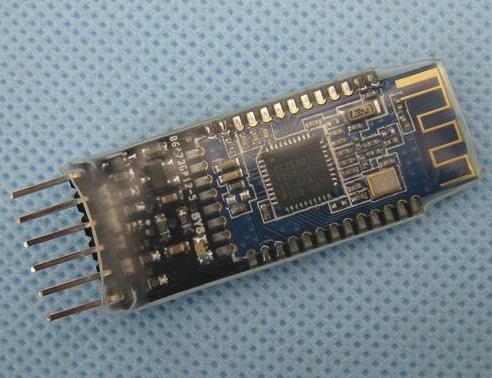
This reflashing mechanism assumes that you are using the HM-10 module mounted on a breakout board.
The HM-10 module is connected to the Windows PC using a TTL to USB adapter. Multiple versions can be purchased online.
As an alternative, we have used an Arduino Uno board where the ATmega chip (through hole) has been removed from its socket. Connect pins 0 and 1 in the Arduino board to pins RXD and TXD of HM-10 module. You also need to connect 5V and ground from the Arduino board to Vcc and GND of the HM-10 breakout board. Now connect the Arduino to the PC, open Windows Device Manager and write down the COM/serial port assigned to the board.
You need to download the latest HM-10 firmware version from Jinan Huamao Technology website. In this page you can find the user manual and the latest firmware versions for different modules/configurations.
Download the file named "HM-10 HMSoft CC254x Vyyy firmware update file". Choose either CC2540 or CC2541 based on the TI chip integrated in your module (you may need a magnifying glass to read the value from the chip). Note that the most recent versions of the HM-10 module integrate CC2541.
Unzip the file in a local folder in your PC and execute HMSoft.exe. Select HMSoft.bin in the field “Image File” (it should have been extracted in the same local folder). Finally, update the COM port value to the value you read before in the Device Manager.
Now open the Arduino IDE, select the same COM port and open the console. Configure the connection options to 9600 bauds and “No line ending”. If you have properly connected all the wires and the HM-10 module is configured at 9600 bauds, you can send AT from the console input and you should see the response OK written in the console output.
If you want to know the current firmware version, send AT+VERR?
You are now ready to begin the firmware upgrade process.
IMPORTANT: If the upgrade process fails, the module may be bricked and becomes useless. It is recommended that the upgrade process is executed without interruption and without disconnecting the Arduino/HM-10 module until the HMSoft application reports a successful upgrade.
To begin with the upgrade, you must inform the module sending the following command from the arduino console:
AT+SBLUP
The green led in the HM-10 module will faint but keep constantly on (no blinking). Now you need to close the Arduino console to free the COM port so that it can be used by the HMSoft application.
Press “Load Image” on the HMSoft screen and the module upgrade will start. The progress bar will begin moving and after a while the process should finish with a successful pop up window and the green led should start blinking again at full brightness.
If you open now the Arduino console and send command AT+VERR?, you can check that the firmware has been upgraded.
If the upgrade process fails and the module stays with the fixed green LED, you can try to reset it by connecting PIO0 (BRK pin of the breakout board) to ground but depending on what went wrong this might not solve the problem.
The same mechanism can be used to upload other firmwares different from the ones provided by the manufacturer. There are people that have implemented a wireless keyboard/mouse ( HID device) or an interpreter to write your BLE applications in Basic.
The internet is full of amazing projects based on the HM-10 module. Go, look for them and keep learning!
Useful links
http://www.jnhuamao.cn/downloadromen.asp?id=
http://www.jnhuamao.cn/bluetooth40_en.zip
http://www.blueluminance.com/HM-10-as-iBeacon.pdf
http://www.shashankteotia.in/experiments-with-ble-4-0
http://letsmakerobots.com/node/40237?page=1
https://punchthrough.com/bean/
https://github.com/rampadc/cc2540-hidKbdM
https://github.com/aanon4/BlueBasic/wiki/Getting-started:-Hello-World
This post was initially published in Spanish in the wiki of Makespace Madrid. If you can read Spanish, do browse through the site because you might find lots of useful information related to BLE and other topics.